[TOC]
Springboot整合第三方登录
为什么采用第三方登录
采用第三方登录可以避免重新注册账号的繁琐,也不需要再为密码和昵称发愁,而第三方登录有一个比较好用的包,里面整合了多种第三方登录,开箱即用,非常方便。就是JustAuth,网址https://www.justauth.cn/。
整合第三方登录
创建应用
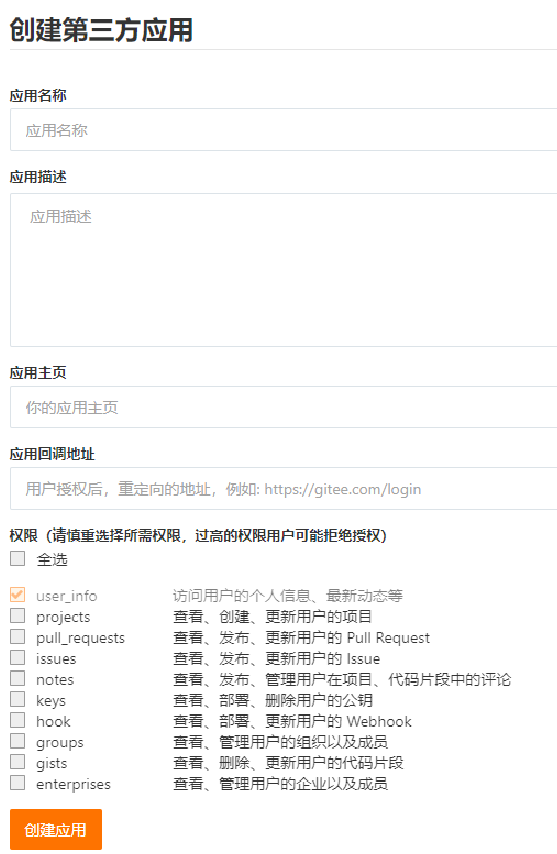
这里采用gitee进行测试,因为gitee不需要其他的东西,只需要你有一个账号就可以。注册一个gitee账号后,到这里(https://gitee.com/oauth/applications)创建一个应用。

应用名称,这个根据自己的需要填,我测试使用就填了一个测试demo1
应用描述可填可不填
应用主页需要填一个已经上线的项目地址(这个不一定要填自己的项目,因为既然要整和第三方登录,那项目大概率是没上线的,这里可以随便填一个可用的网址,某度什么的都可以)
应用回调地址这个不能随便填,这个地址是之后用户授权后的回调地址,这是我测试时填的http://localhost:8080/oauth/callback
权限 根据页面提示操作,默认勾选第一个就行

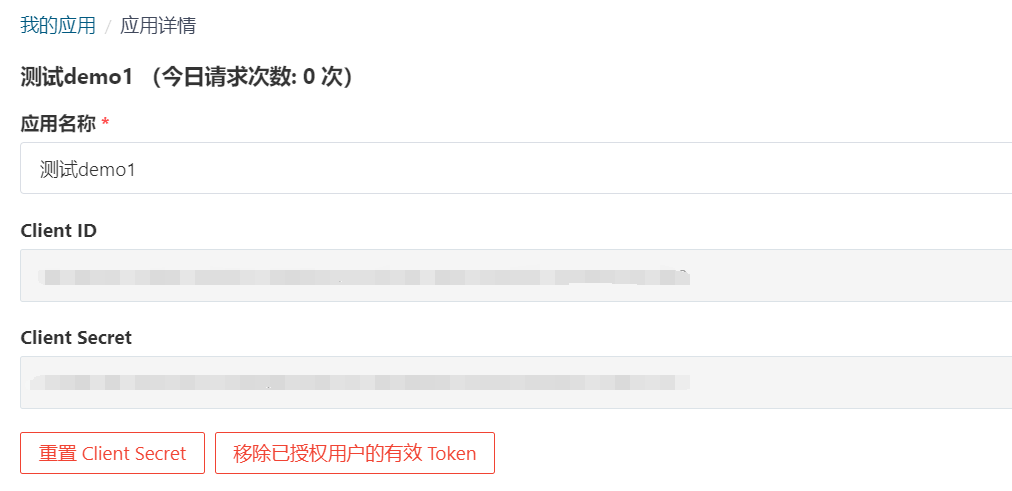
创建成功后,可以在我的应用里面找到这个应用,里面的ClientID和ClientSecret是待会要用到的。
导入依赖
1
2
3
4
5
6
7
8
9
10
11
12
|
<dependency>
<groupId>me.zhyd.oauth</groupId>
<artifactId>JustAuth</artifactId>
<version>1.16.5</version>
</dependency>
<dependency>
<groupId>com.alibaba.fastjson2</groupId>
<artifactId>fastjson2</artifactId>
<version>2.0.7</version>
</dependency>
|
创建controller类
1
2
3
4
5
6
7
8
9
10
11
12
13
14
15
16
17
18
19
20
21
22
23
24
25
26
27
28
29
30
31
32
33
34
35
36
37
38
39
40
41
42
43
44
45
46
47
48
49
50
| import me.zhyd.oauth.config.AuthConfig;
import me.zhyd.oauth.request.AuthGiteeRequest;
import me.zhyd.oauth.model.AuthCallback;
import me.zhyd.oauth.request.AuthRequest;
import me.zhyd.oauth.utils.AuthStateUtils;
import org.springframework.web.bind.annotation.PathVariable;
import org.springframework.web.bind.annotation.RequestMapping;
import org.springframework.web.bind.annotation.RestController;
import javax.servlet.http.HttpServletResponse;
import java.io.IOException;
@RestController
@RequestMapping("/oauth")
public class RestAuthController {
@RequestMapping("/render")
public void renderAuth(HttpServletResponse response) throws IOException {
AuthRequest authRequest = getAuthRequest();
response.sendRedirect(authRequest.authorize(AuthStateUtils.createState()));
}
@RequestMapping("/callback")
public Object login(AuthCallback callback) {
AuthRequest authRequest = getAuthRequest();
AuthResponse login = authRequest.login(callback);
JSONObject remoteData = JSONObject.parseObject(JSON.toJSONString(login));
Object gitEEUser = remoteData.get("data");
JSONObject user = JSONObject.parseObject(JSON.toJSONString(gitEEUser));
Object nickname = user.get("nickname");
Object email = user.get("email");
HashMap<String,Object> map = new HashMap<>();
map.put("nickname",nickname);
map.put("email",email);
return map;
}
private AuthRequest getAuthRequest() {
return new AuthGiteeRequest(AuthConfig.builder()
.clientId("Client ID")
.clientSecret("Client Secret")
.redirectUri("应用回调地址")
.build());
}
}
|
测试访问 localhost:8080/oauth/rander 接口,授权认证后,显示昵称和邮箱


